Tuesday, August 12, 2014

My Studio

I realized I haven't posted any pictures of my studio makeover.  Bob likes to call this room my studio; actually it's a sewing room, craft room, stitching room, morning room, office, all rolled into one.  I'm fortunate to have a large room with high ceilings and lots of windows.

I really don't have any before pictures.  The previous owners of the house used this room as a media room which consisted of black out curtains, a reclining sofa, a HUGE tv and it was decorated with John Wayne memorabilia.  I guess you can imagine that.

My first order of business was built-in in shelving and workspaces for my computer and sewing machine.


I did a T shaped workspace since the room is so large.  The extra peninsula space is available on the office side and the sewing side which really helps.  The shelves provide tons of storage for books and stitching/craft supplies.  The blue apron hanging in the center was used and made by my Grandma from feed sack material.

The end of the peninsula is a bookcase for extra storage.


Moving to the left is an outside wall with sliding glass doors leading on to a porch.  The high ceilings allow space for hanging stitched pieces that haven't found a home anywhere else in the house.  I have a large counter height worktable in front of the sliding glass doors.  The light pouring on to the workspace is fabulous!


Still moving to the left, opposite the built-ins, is a sitting area with lots of lights for stitching.  The sofa is a sleeper so we have some extra guest space if we need it.  The quilt hanging on the wall was made by my Grandma and was the inspiration for the wall color.


The fourth wall has a closet which is full of shelves to store more craft, sewing, and stitching supplies.  The white shelf unit mounted on the wall has glass door knobs as hangers and is where I hang my main stitching and project bags.  I've got a TV in the corner on a roller cart that I can pull out to watch while I stitch.


I seem to spend most of my time in this room doing something or other.  Hmmmm what will I start on today?

Hope you enjoyed the tour!
Sherri

Sunday, August 3, 2014

Sewing with my granddaughters

Aislyn and Alyse wanted to learn how to sew on the sewing machine. They are 9 and 10 years old so it seems the perfect time.  One evening during a sleep over, they sewed sleeping bags and matching pillows for their American Girl dolls.  (Of course the dolls had come along for the sleep over.)  I forgot to take pictures, darn it, but the girls sewed beautifully!  They learned straight seams, clipping corners, turning, stuffing, and hand sewing the pillow opening shut.  They also learned to sew buttons on the corners of their pillows. Quite a bit for their first lesson!

The second sewing lesson came during another sleep over.  This time they wanted to sew clothes for their American Girl dolls.  We started with a trip to the fabric store to pick out fabric for a simple gathered skirt and matching headband.  They learned how to do narrow hems and casings, how to insert elastic, and how to turn a tube inside out.

My new sewing machine helped them this time since it's so much easier to control the speed.  Here Alyse concentrates on the seam for her headband.


Aislyn working at the ironing board pressing the seams.


And ta-da!  The finished skirts and headbands.


But why are there 3 dolls, you may ask?  Aislyn's doll is on the right, Alyse's on the left, and mine is in the middle.  YES!  I have an American Girl doll!  I figured I needed a model for sewing doll clothes, so I found this one on ebay for a great price.  She was a bit dirty and her hair was pretty tangled, but she cleaned up just fine.

Does a girl ever get too old to play with dolls?

Happy stitching!

Monday, July 21, 2014

Where my heart is . . .

I just made an interesting observation.  Looking at my labels on the right side of this blog, notice that the word "stitching" is way big and the word "work" is way small.

Just a hint as to where my heart is!

Sunday, July 20, 2014

More doll clothes

 Continuing on with the doll wardrobes for my grandaughters . . . 
 

Every girl needs a fun outfit for lunching and shopping!  This outfit used the FREE Trendy T-Shirt Pattern from Liberty Jane and a Mini Skirt pattern  also from Liberty Jane.  The skirt and shopping tote were made from a little dress I found at a thrift store.  That's why the tote has such a nice pocket :)  I added purple lace trim from my stash.


Perfect for helping Mommy in the kitchen.  This cute apron and oven mitt were made from the FREE  pattern found at Fun Threads Designs.  You can also make a chef's hat and there are a bunch of other fun free patterns on this site.


These shirts were made from the FREE t-shirt pattern at Second Chance Studio and the pattern for the wrap around skirts is FREE at You Can Make This.  Be sure to check out their other adorable skirt patterns.  


A couple more outfits using the Mini Skirt pattern and the FREE Trendy T-Shirt Pattern.  I just added the Spaghetti Strap Tank Top which is also FREE at Liberty Jane.  Cutting up old t-shirts to make these tops is fun and really cheap.  I picked up several at a yard sale for 50 cents!


 And cozy flannel pajamas to snuggle into at the end of the day.  I used the Trendy T-Shirt pattern again with the long sleeve variation.  The pants pattern is FREE from Milo Mila and is perfect for pajamas.

Thanks so much for viewing my fashion show!  I'm a bit obsessed with doll clothes right now, so I'll probably have more :)

Happy Stitching


Thursday, July 17, 2014

Sewing Doll Clothes

Some time ago, I embarked on a journey to sew an entire wardrobe of clothes for Aislyn's and Alyse's American Girl dolls.  I had the most fun!!  Most of the patterns I used were free online somewhere but I did buy some patterns from Liberty Jane.  They have the cutest things.  Anyway, here are a few outfits from this endeavor:


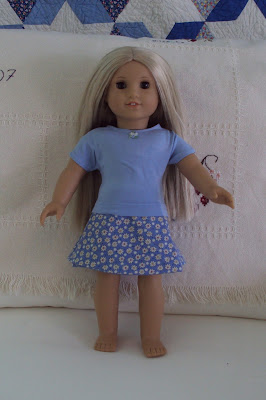
I borrowed the Julie doll from my neighbor to use as a model.  Isn't she beautiful!  All three of the above dresses were made with the "Color Block Dress Pattern" from Heritage Doll Fashions.


This summer dress was made with the FREE "Drawstring Dress Pattern" also from Heritage Doll Fashions.  I cut up a baby dress I found at a thrift store.  I guess you could also call these "Pillowcase Dresses".  They're super fun to make.


The skirts in both of these outfits were made using the Harajuku Station Skirt Pattern from Liberty Jane.  I used thrift store finds again and the shirt of the first outfit used the FREE Trendy T-Shirt Pattern from Liberty Jane.  The second shirt used the Spaghetti Strap Tank Pattern, also from Liberty Jane.  As it turned out, Alyse has the same pink skull shirt I cut up to make this one. I think all the girls like to match their dolls.!


These two play outfits were also made from baby clothes I found at the thrift store.  I didn't use a pattern for the pants, but just cut them down to size.  The shirts were made from the FREE t-shirt pattern at Second Chance Studio and the FREE Trendy Tank Top Pattern from Liberty Jane.

Well, that's enough for today.  I'll post the rest of the wardrobes another time.  In the meantime, if you're looking for more free doll clothes patterns, check out my board on Pinterest.

Happy stitching!